
Stock & Noble
How to paint Timber Post and Rail Fences in Australia and New Zealand?
- BY Tripti Kakkar
Are you looking to paint the brand-new fences on your horse property? Or do you want to refresh the old fence and wondering where to begin?
At Stock & Noble, we have years of experience and expertise in developing premium fence paints for equine Timber and Steel fences. Our aim is to educate you about the crucial steps to keep in mind before you begin painting those fences.
If you have PVC, Plastic fences or Buckley Steel fences then this article is not for you. These materials don’t need to be painted. For those of you with Timber Post and Rail fences, dive right in and we’ll help you find your way to fabulous looking fencing.
7 Critical steps to paint Timber Fences on your horse property
Step 1: Weather the wood
New softwood timber (Pine, etc) should be allowed to weather for a minimum of 4-6 weeks before painting. This allows moisture and resins to escape the timber.
All hardwoods should be left uncoated for as long as possible until all tannins have leached from the timber. In most cases, tannins appear as a brownish or tan discolouration on the surface of the timber. They are basically acids that will dissolve any product applied to the timber. Rain or moisture is necessary for tannins to release from the timber and the process can take longer in dry areas.
- For oily timbers: Kwilia (Merbau), Tallowood, Blackbutt etc. A minimum of 3-6 Months is recommended.
- For dense timbers: Ironbark, Spotted Gum, Yellow Balau, Batu, Ulin, Messmate etc. A minimum of 6 months is recommended. Ironbark may require significantly longer.
Before painting Hardwoods, they need to be weathered for a long time. It may be necessary to allow for a longer period during prolonged cold or wet conditions. In case of doubt, it is best to paint a test piece or small area first and monitor it for satisfactory adhesion and drying.
Step 2: Do a weathering test
Apply some water to the timber. Let it sit for a few minutes. If the water is absorbed into the timber, the timber should be ready for painting. If the water beads, then the timber needs to be weathered for a further period.
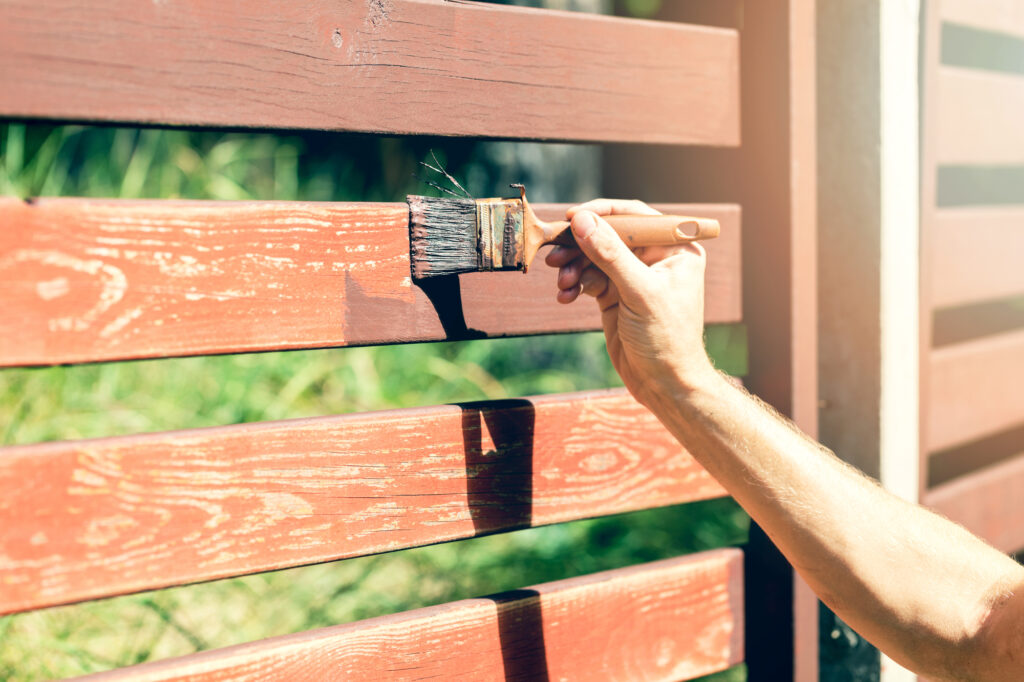
Step 3: Prepare the wood
This is the most important part of painting your Timber Post and Rail Fences. Whether it’s brand-new or your good old timber, it should be absolutely clean, free of any dust, mould or sap oozing out of it.
If the wood isn’t clean enough or rotten on top the new paint attaches itself to the layer of rotten timber and the whole painting project will fail.
If you’re planning to do it all by yourself, think again. A lot of horse properties benefit by hiring a professional who can bring a water tank and use a high-pressure water blast. It makes the job much easier, faster and better as compared to using a small hose.
To clean your Timber Post and Rail fences in the most effective way possible, we recommend water-blasting them using a pressure of 3000 PSI. In our experience it removes the top layer of grey old wood, revealing the fresh clean timber from beneath that is all ready to be painted and gives your property a fencelift.
For any left-over stubborn areas, these parts could be cleaned using a wire brush.
Once water blasting and cleaning are done, check your fence, it should look fresher leaving no grey wood or other problem areas.
Step 4: Choose paint for Timber Post and Rail Fences
Once your wood is clean and dry it’s time to choose the paint. A lot of factors can affect your final decision here, whether you need a water-based or oil-based paint, which colour would you prefer, the quality, longevity of the paint and the price.
There are premium options like Master Blend Paints which last for over 5 years and others like Stud X which are good too if you’re looking for a cheaper option. You can read this article to know further about how to choose paint for your Timber Post and Rail Fences.
Step 5: Do a final check
When your wood is weathered, prepped and dried, it’s a bright sunny day and you’re finally ready to colour your post and rails, stop. Check for any moisture or leaking tannins for the last time. The wood should be absolutely dry to absorb moisture from the paint and bond well.
If there are any tannins, the paint will just break down before it gets a chance to make your fences fabulous. We’ve seen some examples where painting bright white on Timber with the slightest of tannins made the whole colour brownish. So, it’s better to check and make sure the timber is clean and dry.
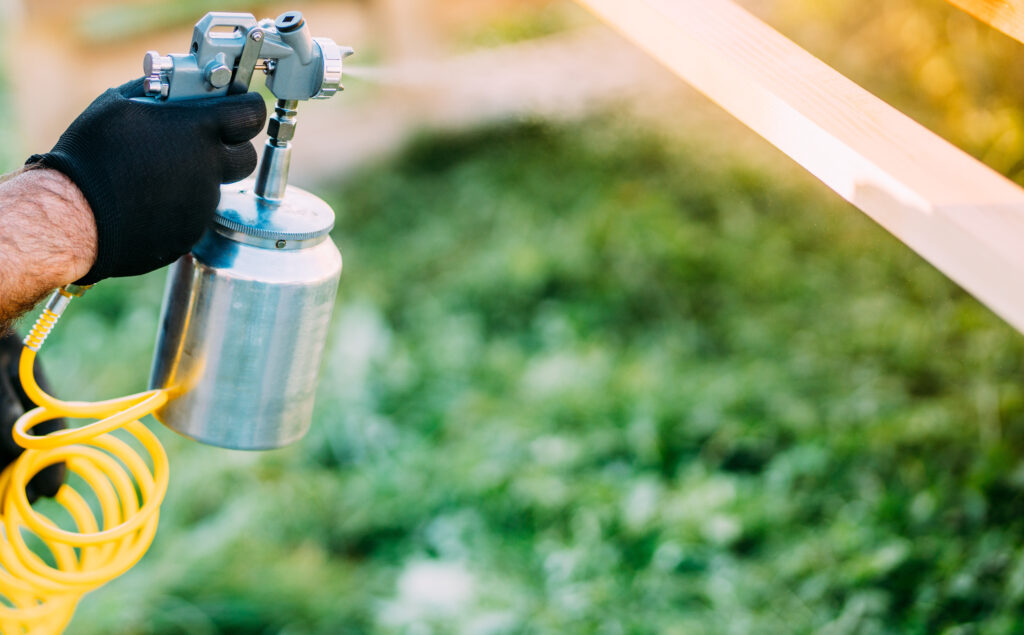
Step 6: Apply the paint
There are different ways to apply the paint, through a brush, roller or airless sprayer. The best way is to use a spray gun and we recommend leaving this step to a professional. It’s really important for the coating to be applied evenly and perfectly so that the paint lasts longer and looks smooth across all posts and rails.
If you choose to do it yourself, use a narrow nozzle to reduce wastage and make sure the surroundings don’t get over-sprayed on a windy day.
Master Blend Paints are water-based and can be applied without the need for thinning. If you are using a pot sprayer (driven via an air compressor) you may need to thin the paint. You can thin with up to 10% water.
Stir thoroughly with a flat-bladed stirrer using a stirring lifting action. Apply the paint only when the air and surface temperatures are between 10°C – 30°C.
Step 7: Re-coat the fences
With Master Blend Paints, we recommend applying a double coat. Once you’ve applied the first coat, it usually dries up in 30 minutes, and the second coat can be applied within 2 hours. For other paints, check the manufacturer’s recommendation on the packaging.
Timber Posts and Rails usually need to be painted every 5 years, depending on the preparation and quality of paints you’ve chosen. Master Blend Paints come in three different ranges:
- Classic Black – Lasts for 2 years
- Forever Black – Lasts for 6 years
- Forever White – Lasts for 10 years
Ready to start painting your Timber Post and Rail?
We are sure you are now much more confident in choosing the paint for your horse property and applying it, the right way. These steps ensure that the time, money and effort you invest in painting are worth it and you don’t have to revisit the whole process anytime soon. When applied well, the paint lasts longer, elevates the overall look of your property and keeps the timber protected.
After you decide to paint your Timber Post and Rail fences, it is important to know how much it will cost. This article lays out all the major components that contribute to the cost of your fence painting project. All you need to know is the area you want to cover, and the cost estimator will guide you to calculate the cost of painting Timber fences on your horse property.
If you need more help in finding the best solution for your painting needs, our fencing experts are there to help you. You can book a free personalised discussion for painting fences on your horse property and we’ll do our best to answer all your questions. So reach out to our fencing expert and colour the property of your dreams.

As someone who connects fences and decks, your painting tips are spot on. Weathering and cleaning with a pressure washer ensure paint adhesion. Using proper paint and coating techniques prevents moisture from creeping into deck-fence joints. Well-prepared, sealed timber means longer-lasting integrity across both structures!