Mesh can be a valuable addition to your fencing, especially when it comes to containing animals or securing your property.
If you’re planning to get steel fencing for your property and wondering whether you can attach the mesh to it, the answer is a resounding yes.
In other good news, whether you’re working with timber or steel post and rail fencing, the process of attaching and tensioning the mesh remains relatively consistent.
In the world of fencing, knowing how to stretch, attach, and secure mesh is a great skill that can enhance the functionality and aesthetics of your fencing. The process involves subtle nuances, depending on whether you are working with timber or steel posts, and it’s not just about the mesh itself – the choice of fixings plays a vital role in the equation.
At Stock & Noble, we provide the finest fencing solutions to high-end property owners across Australia and New Zealand. Our product portfolio includes Premium Steel Post and Rail Fencing (Buckley Fencing) as well as a wide range of equine mesh. Based on our years of experience and product expertise we will share valuable insights on attaching mesh to your post and rail fencing.
Intriguingly, the art of attaching the mesh to Cattle rail and Buckley fencing as well as gates follows a similar methodology, with minor distinctions primarily attributed to the specialised brackets designed specifically for the Buckley Series.
In this step-by-step guide, we’ll focus on attaching the mesh to Cattle Rail and Premium Steel Post and Rail Fencing, with a special mention of the Buckley gates.
So, whether you’re looking to fortify your property for the safety of your livestock or elevate the aesthetics and functionality of your fencing, continue reading. We will walk you through each step, explaining the process and ensuring that you have the knowledge needed to attach the mesh to your steel post and rail fences.
Step #1: Installing Your Main Fence
The first step is to install your main fence. This provides the foundation upon which you’ll attach the mesh. Ensure that your fence is securely in place and properly aligned.
If you’ve already chosen your mesh then you’re all set for the next step. Else take a look at different types of steel mesh and pick the one that best suits your needs and vision.
Step #2: Rolling Out the Fence Mesh
Now, it’s time to roll out the mesh. Start at one point and work along the fence line. Here’s a key point to remember: Start and stop at every fence run. While you can go continuous around gentle curves or slight bends in the fence line, when you encounter a 90-degree corner, it’s time to terminate the mesh.
It’s worth noting that the process of attaching, starting, finishing, and tensioning a wire mesh fence is the same, regardless of whether you’re working with timber, Cattle Rail or Premium Steel Post and Rail fencing.
Step #3: Tensioning and Terminating the Wire Mesh
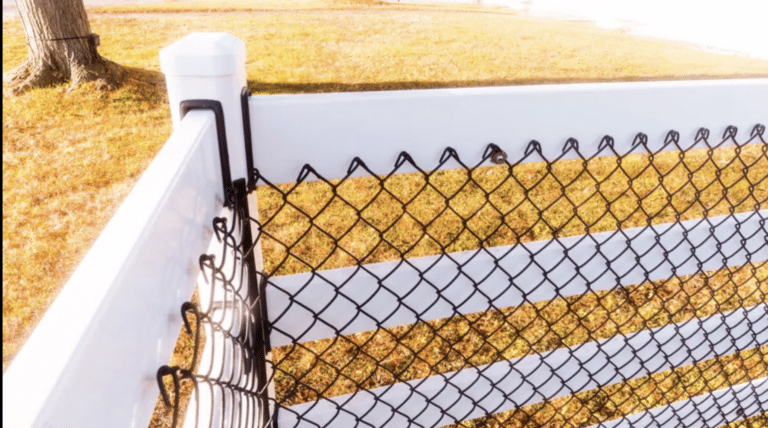
Once you’ve rolled out the mesh and stood it up against the fence, it’s time to tension and terminate it. To secure the mesh, use clips appropriate for your specific fencing type.
For Buckley fencing, there are specific premium mesh clips available. These clips are insulated and feature a rubber seal to prevent rust and weather damage. The result is a 100% weather seal that keeps out the elements, preventing rust and other forms of damage.
For Cattle Rail and other similar fencing types, Davo’s fencing clips are recommended. These clips are suitable for standard applications and insulated options are also available for use with electric fencing.
Clips for Cattle Rail vs. Premium Steel Post and Rail Fencing
Buckley clip has a stainless steel clamping action, a rubber seal that seals off the steel and is designed specifically to fit the Buckley system, blending in seamlessly with the aesthetics of the fence.
On the other hand, Davo’s clip is a practical device that allows you to build fences quicker, easier, stronger and typically longer lasting than other clips available. However, it may be more prone to rust over time. This clip is a great solution when attaching the mesh to Cattle Rail and Steel Posts as it holds and guides the mesh without affecting the integrity of the mesh.
Step #4: Ensuring Proper Clamping
With your clips in place, ensure that the mesh is held securely against the fence. This prevents the mesh from sagging while also ensures that the wire moves freely inside the clip.
This flexibility is important because if animals lean on the mesh, the mesh needs to flex and stretch. This is achieved by the wire moving through the clip. The clip serves as both a holding point and a guide.
Step #5: Repetition on the Next Fence Line
Continue these steps for each fence line. Move on to the next one and repeat the same process of attaching and tensioning the mesh.
Step #6: Meshing Your Gates
Once all your fences are complete, it’s time to mesh your gates. Here’s how:
For our Premium Steel Post and Rail gates, there are wire mesh gate brackets available. These brackets allow you to hang the mesh at the bottom of the gate as low as you want to. This also ensures that when you open the gate, it opens freely.
Cattle Rail gates are often custom-made or tailored to fit specific spaces, so the addition of mesh is considered when designing the gates. Basically, you may not need specific brackets because you can design the gates with mesh attachment in mind. In most cases, these gates are designed to be low to the ground to facilitate mesh attachment.
In case you need to attach the mesh to the gates, you can do it the same way you would attach it to the fence line. Stretch the mesh, pin it to each side, top, bottom and in the middle, and ensure it’s secure against the gate, without being loose or sagging.
When tying off the mesh, the method will depend on the type of steel mesh you’re using. Different mesh types, such as No climb Mesh or Diamond V-mesh, follow the same principle but have their unique way of tying and attaching.
Be sure to follow the installation guide or manufacturer’s instructions or seek professional advice if needed.

Considering Mesh Based on Your Needs
The decision to add mesh to your fencing depends on various factors, including the size and type of your animals, the height of the mesh, and the spacing of your fence rails.
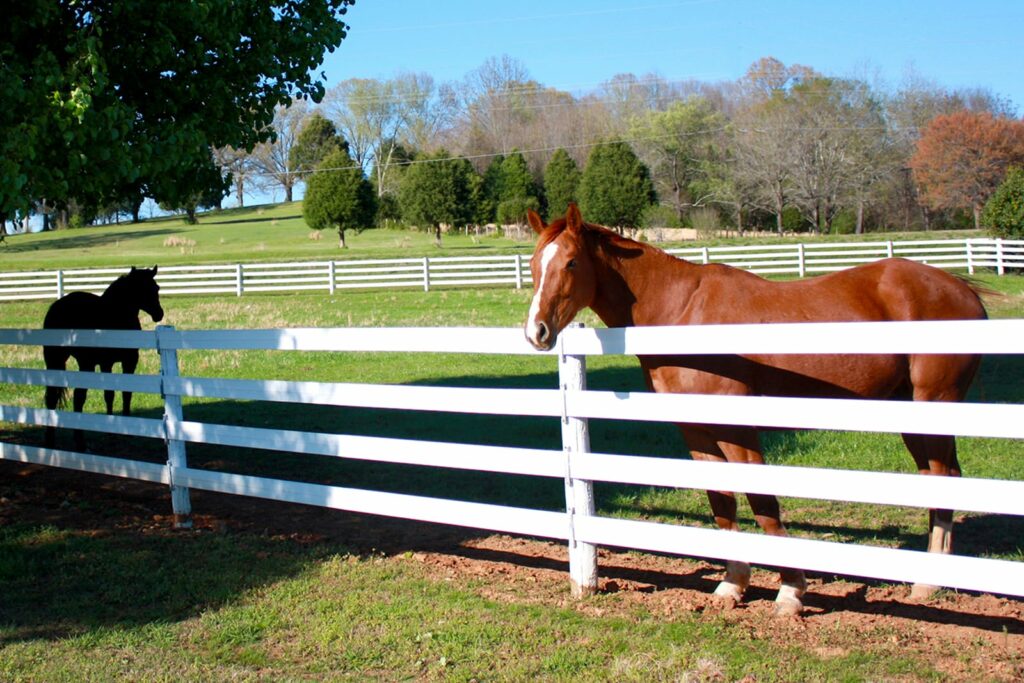
When it comes to the Premium Steel Post and Rail fencing that’s specially designed for equine properties, typically there isn’t a requirement for mesh to be added. A 3 or 4-rail of Buckley fencing is well capable of keeping the horses safely inside.
Mesh is particularly beneficial for fences with fewer rails. For instance, if you have a single top rail or 2 rails, this is where adding mesh becomes a wise consideration. Also, if you have animals other than horses like dogs or sheep on the property.
Before you decide on adding mesh to your fence, it’ll be valuable to learn whether the mesh is needed on your property or not.
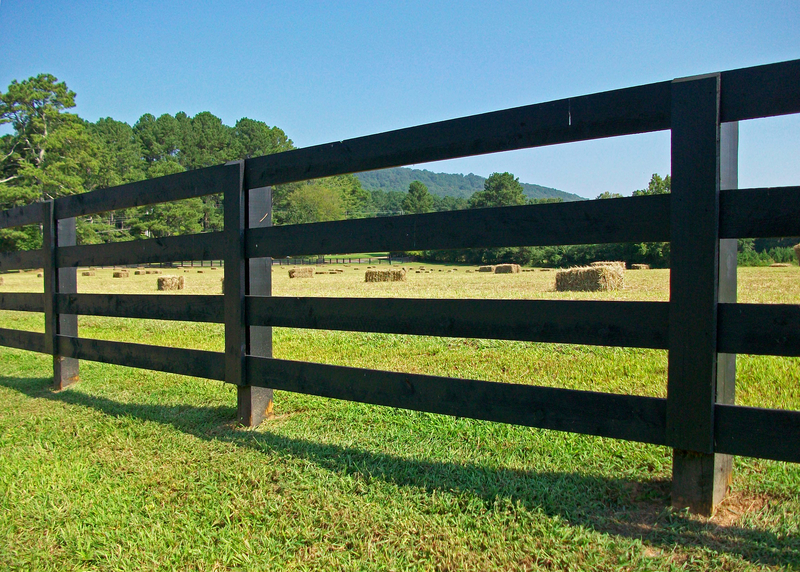
Mesh Attachment on Cattle Rail vs. Premium Steel Post & Rail Fencing
It’s worth noting that attaching mesh to Cattle Rail is generally easier because you can achieve more tension with it. In contrast, the design of Premium Steel Post and Rail fencing makes it challenging to achieve super-tight tension.
Recommended Mesh Type for Premium Steel Post & Rail Fencing
As mentioned earlier Buckley is an engineered steel post and rail fencing designed specifically for horses and doesn’t require additional mesh on a typical equine property. However, we understand that there might be situations where adding mesh becomes important.
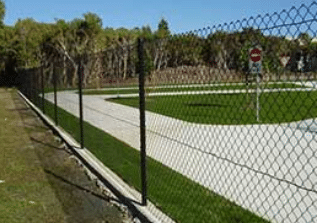
For ease of installation and a straight, aesthetically pleasing appearance, we recommend using PVC-coated chain link mesh for Buckley Steel Post and Rail Fencing.
This type of mesh doesn’t require as much tension to look straight, comes in black, and is a popular choice for properties where the primary concern is keeping dogs and other animals contained around the home.
Are You Confident to Attach Mesh to Your Steel Post & Rail Fencing?
You wanted to know if mesh can be added to your steel post and rail fencing. Now you are through with a detailed process of attaching the mesh to your steel fencing and gates, choosing the appropriate clips as well as brackets. You are also aware of the key differences between Cattle Rail and Premium Steel Post and Rail fencing when it comes to adding mesh.
Overall, the process of attaching the mesh to steel posts and rail fencing, including gates is similar to other fencing types. It’s crucial to remember that your choice of mesh and the method of attachment should align with your specific fencing requirements and the types of animals you intend to contain. When mesh is correctly installed, it not only improves the functionality of your fencing but also enhances its durability and overall aesthetics.
If you’re after a steel mesh for your equine property, this comprehensive guide will help you make the right decision. For any further questions related to choosing the right mesh for your fencing, the process of installation, cost or more get in touch with our fencing experts. They will guide you in the right direction and help create a safe and beautiful property.